Showing posts with label Windows 2012. Show all posts

23 May 2017

Start Menu locations - Or add a simple Start Menu yourself without 3rd party tools

I keep forgetting the path to the Start Menu:
"C:\Program Data\Microsoft\Windows\Start Menu\Programs"

This is the same for Windows 7 up to Windows 10, and for Server 2012 to Server 2016.

But, wouldn't it be nice to have some sort of start menu without installing some malware/spyware infested tool? Then this quick fix is for you:

  • Display "Hidden items" on your C: Drive.
  • Open File Explorer and browse to your C: Drive. 
  • On the View tab, check the "Hidden items" checkbox.
  • Add a New Toolbar on your Taskbar.
  • Right-click on a blank area of your Taskbar and select Toolbars > New Toolbars.
  • Browse to the Start Menu\Programs folder.
  • In the New Toolbar dialog box, browse to the "C:\Program Data\Microsoft\Windows\Start Menu\Programs" folder. 
  • Click the "Select Folder" button.
  • Click the "Select Folder" button to add the new Toolbar to your Taskbar.

Here's what it looks like:

12 February 2017

Steps for renewing NDES Service Certificates

Well this was a life saver once again, being on vacation the moment this was implemented, and the supplied documentation by the 3rd party that did that being insufficient, this saved my a s s.
And as stated by the blogger "chdelay" there's not a lot of info to be found on this matter.


For those organizations that used the Network Device Enrollment Service run into the process for renewing the certificates for NDES. I never was able to find good instructions on how to do this. So, I had no choice but to create my own. The steps in this blog posting cover how to renew the certificates used by the Network Device Enrollment Service. You will need to be logged in as an Enterprise Admin for most of the steps outlined in this posting.

Step 1: First give the NDES Server Read and Enroll permission to the CEP Encryption Certificate Template.

Step 2: Open the certificates MMC targeted to the computer.  Expand Personal.  Right-click on Certificates.  From the context menu select All Tasks then Renew Certificate with New Key…

Step 3: On the Before You Begin page of the wizard, click Next.

Step 4: On the Request Certificates page, click Enroll.

Step 5: On the final page of the wizard, click Finish.

Step 6: Open Certmgr.msc as a user that has Read and Enroll permissions to the Exchange Enrollment Certificate Template.  Expand Personal, right click on Certificates.  Select All Tasks, and then Request New Certificate…

Step 7: On the Before You Begin page, click Next.

Step 8: On the Select Certificate Enrollment Policy page, click Next.

Step 9: Select the Exchange Enrollment Agent certificate template, and click the More information is required to enroll for this certificate. Click here to configure settings. link.

You will want to user the same Subject Name that is in your current Exchange Enrollment certificate. The following steps illustrate the steps needed to do this. You can find the current subject name by opening the Certificates MMC targeted to the local machine and then open the existing Exchange Enrollment Agent certificate. In my example the name was CN=FCNDES01-MSCEP-RA,C=US.

Step 10: Under Subject Name ensure that Common Name is selected and under Value enter the common name that is in your existing certificate. Then click Add.

Step 11: Change the Type to Country and under Type the country code that is your existing Exchange Enrollment Agent certificate.

Step 12: Click Add

Step 13: On the Private Key tab, select Make private key exportable.  Then click OK.

Step 14: Then click Enroll.

Step 15: Right-click on the Exchange Enrollment certificate in the users personal store.  Select Export…

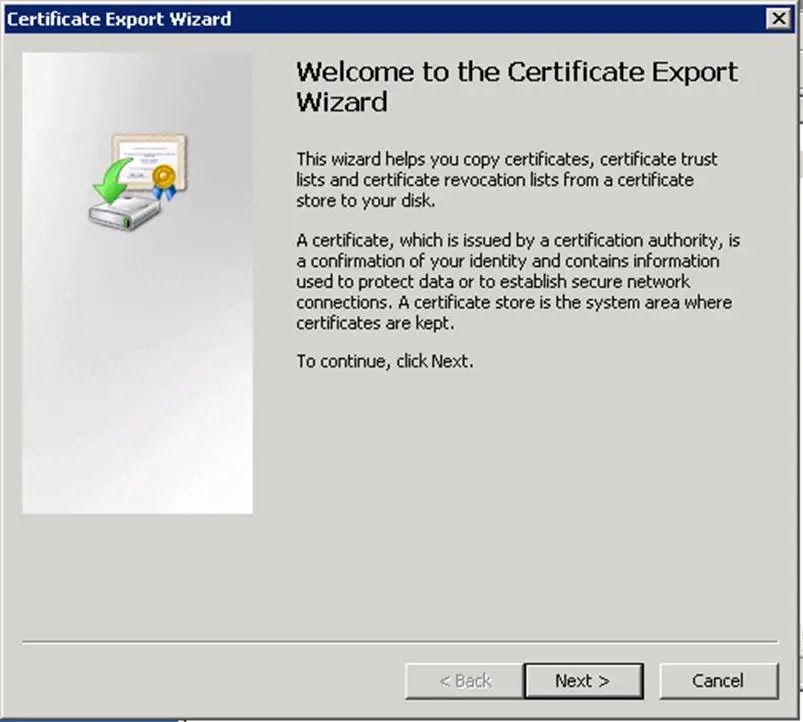
Step 16: When the Certificate Export Wizard opens, click Next.

Step 17: On the Export Private Key page, select Yes, export the private key.

Step 18: On the Export File Format page, select Personal Information Exchange – PKCS #12 (.PFX)

Step 19: On the Password page, enter a password and click Next.

Step 20: On the File to Export page, click the Browse… button.  Select the file name and save location.  When finished click Next.

Step 21: On the final page of the wizard, click Finish.

Step 22: Then click OK.

Step 23: In the Certificate MMC on the NDES Server that is targeted to the computer, expand Personal.  Right-click on Certificates.  From the context menu, select All Tasks and then Import…

Step 24: On the Welcome page, click Next.

Step 25: Browse to the PFX file you previously created, and click Next.

Step 26: On the Password page, enter the password associated with the PFX file.

Step 27: On the Certificate Store page, click Next.

Step 28: On the final page of the wizard, click Finish.

Step 29: Then click OK.

Step 30: In the Certificate MMC on the NDES Server that is targeted to the computer, expand Personal.  Right-click on the old Exchange Enrollment certificate, and select Delete. 

Step 31: Then click Yes, to accept the deletion.

Step 32: Right click on the new Exchange Enrollment certificate.  From the context menu, select All Tasks then Manage Private Keys…

Step 33: Add the NDES service account and ensure that it just has Read permission.  Click OK.

Step 34: Right click on the new CEP Encryption certificate.  From the context menu, select All Tasks then Manage Private Keys…

Step 35: Add the NDES service account and ensure that it just has Read permission.  Click OK.
Step 36:  Reset IIS using iisreset command.

Step 37: Check the following url:
https://localhost/certsrv/mscep

Step 38: Check the following url:
https://localhost/certsrv/mscep_admin

When both pages are displaying the above then you know your NDES/SCEP is working correctly

10 May 2016

Disable SSL 3.0, Weak Ciphers and enable TLS 1.1 and 1.2

Windows Server 2008 (R2) using IIS 7 allows SSL 2.0 and SSL 3.0 by default. Unfortunately, this means you will fail a PCI Compliance scan by default. To properly secure your server and ensure that you pass your PCI-DSS scans, you will need to disable SSL 2.0 and disable weak ciphers. In order to disable SSL 2.0 and SSL 3.0 in IIS 7 and make sure that the stronger TLS 1.0 is used, even better enable TLS 1.1 and TLS 1.2.

Below you can find how to disable SSL 3.0 and the weak Ciphers, and enable TLS 1.1 and TLS 1.2.

Remember that this only works after a server reboot, stopping services or IIS is not enough

UPDATE: 27-05-2016 I found an error in the registry key settings, below are the correct settings.

Disable SSL3.0. and Weak Ciphers and Enable TLS 1.1 and 1.2

Copy the text below and paste in to a .reg file:

Windows Registry Editor Version 5.00

[HKEY_LOCAL_MACHINE\SYSTEM\CurrentControlSet\Control\SecurityProviders\SCHANNEL]
"EventLogging"=dword:00000001
[HKEY_LOCAL_MACHINE\SYSTEM\CurrentControlSet\Control\SecurityProviders\SCHANNEL\Ciphers]
[HKEY_LOCAL_MACHINE\SYSTEM\CurrentControlSet\Control\SecurityProviders\SCHANNEL\Ciphers\AES 128/128]
"Enabled"=dword:ffffffff
[HKEY_LOCAL_MACHINE\SYSTEM\CurrentControlSet\Control\SecurityProviders\SCHANNEL\Ciphers\AES 256/256]
"Enabled"=dword:ffffffff
[HKEY_LOCAL_MACHINE\SYSTEM\CurrentControlSet\Control\SecurityProviders\SCHANNEL\Ciphers\DES 56]
"Enabled"=dword:00000000
[HKEY_LOCAL_MACHINE\SYSTEM\CurrentControlSet\Control\SecurityProviders\SCHANNEL\Ciphers\DES 56/56]
"Enabled"=dword:00000000
[HKEY_LOCAL_MACHINE\SYSTEM\CurrentControlSet\Control\SecurityProviders\SCHANNEL\Ciphers\NULL]
"Enabled"=dword:00000000
[HKEY_LOCAL_MACHINE\SYSTEM\CurrentControlSet\Control\SecurityProviders\SCHANNEL\Ciphers\RC2 128/128]
"Enabled"=dword:00000000
[HKEY_LOCAL_MACHINE\SYSTEM\CurrentControlSet\Control\SecurityProviders\SCHANNEL\Ciphers\RC2 40/128]
"Enabled"=dword:00000000
[HKEY_LOCAL_MACHINE\SYSTEM\CurrentControlSet\Control\SecurityProviders\SCHANNEL\Ciphers\RC2 56/128]
"Enabled"=dword:00000000
[HKEY_LOCAL_MACHINE\SYSTEM\CurrentControlSet\Control\SecurityProviders\SCHANNEL\Ciphers\RC4 128/128]
"Enabled"=dword:00000000
[HKEY_LOCAL_MACHINE\SYSTEM\CurrentControlSet\Control\SecurityProviders\SCHANNEL\Ciphers\RC4 40/128]
"Enabled"=dword:00000000
[HKEY_LOCAL_MACHINE\SYSTEM\CurrentControlSet\Control\SecurityProviders\SCHANNEL\Ciphers\RC4 56/128]
"Enabled"=dword:00000000
[HKEY_LOCAL_MACHINE\SYSTEM\CurrentControlSet\Control\SecurityProviders\SCHANNEL\Ciphers\RC4 64/128]
"Enabled"=dword:00000000
[HKEY_LOCAL_MACHINE\SYSTEM\CurrentControlSet\Control\SecurityProviders\SCHANNEL\Ciphers\Triple DES 168/168]
"Enabled"=dword:ffffffff
[HKEY_LOCAL_MACHINE\SYSTEM\CurrentControlSet\Control\SecurityProviders\SCHANNEL\CipherSuites]
[HKEY_LOCAL_MACHINE\SYSTEM\CurrentControlSet\Control\SecurityProviders\SCHANNEL\Hashes]
[HKEY_LOCAL_MACHINE\SYSTEM\CurrentControlSet\Control\SecurityProviders\SCHANNEL\Hashes\MD5]
"Enabled"=dword:00000000
[HKEY_LOCAL_MACHINE\SYSTEM\CurrentControlSet\Control\SecurityProviders\SCHANNEL\Hashes\SHA]
"Enabled"=dword:ffffffff
[HKEY_LOCAL_MACHINE\SYSTEM\CurrentControlSet\Control\SecurityProviders\SCHANNEL\Hashes\SHA256]
"Enabled"=dword:ffffffff
[HKEY_LOCAL_MACHINE\SYSTEM\CurrentControlSet\Control\SecurityProviders\SCHANNEL\Hashes\SHA384]
"Enabled"=dword:ffffffff
[HKEY_LOCAL_MACHINE\SYSTEM\CurrentControlSet\Control\SecurityProviders\SCHANNEL\Hashes\SHA512]
"Enabled"=dword:ffffffff
[HKEY_LOCAL_MACHINE\SYSTEM\CurrentControlSet\Control\SecurityProviders\SCHANNEL\KeyExchangeAlgorithms]
[HKEY_LOCAL_MACHINE\SYSTEM\CurrentControlSet\Control\SecurityProviders\SCHANNEL\KeyExchangeAlgorithms\Diffie-Hellman]
"Enabled"=dword:ffffffff
[HKEY_LOCAL_MACHINE\SYSTEM\CurrentControlSet\Control\SecurityProviders\SCHANNEL\KeyExchangeAlgorithms\ECDH]
"Enabled"=dword:ffffffff
[HKEY_LOCAL_MACHINE\SYSTEM\CurrentControlSet\Control\SecurityProviders\SCHANNEL\KeyExchangeAlgorithms\PKCS]
"Enabled"=dword:ffffffff
[HKEY_LOCAL_MACHINE\SYSTEM\CurrentControlSet\Control\SecurityProviders\SCHANNEL\Protocols]
[HKEY_LOCAL_MACHINE\SYSTEM\CurrentControlSet\Control\SecurityProviders\SCHANNEL\Protocols\Multi-Protocol Unified Hello]
[HKEY_LOCAL_MACHINE\SYSTEM\CurrentControlSet\Control\SecurityProviders\SCHANNEL\Protocols\Multi-Protocol Unified Hello\Server]
"Enabled"=dword:00000000
"DisabledByDefault"=dword:00000001
[HKEY_LOCAL_MACHINE\SYSTEM\CurrentControlSet\Control\SecurityProviders\SCHANNEL\Protocols\PCT 1.0]
[HKEY_LOCAL_MACHINE\SYSTEM\CurrentControlSet\Control\SecurityProviders\SCHANNEL\Protocols\PCT 1.0\Server]
"Enabled"=dword:00000000
"DisabledByDefault"=dword:00000001
[HKEY_LOCAL_MACHINE\SYSTEM\CurrentControlSet\Control\SecurityProviders\SCHANNEL\Protocols\SSL 2.0]
[HKEY_LOCAL_MACHINE\SYSTEM\CurrentControlSet\Control\SecurityProviders\SCHANNEL\Protocols\SSL 2.0\Client]
"DisabledByDefault"=dword:00000001
"Enabled"=dword:00000000
[HKEY_LOCAL_MACHINE\SYSTEM\CurrentControlSet\Control\SecurityProviders\SCHANNEL\Protocols\SSL 2.0\Server]
"Enabled"=dword:00000000
"DisabledByDefault"=dword:00000001
[HKEY_LOCAL_MACHINE\SYSTEM\CurrentControlSet\Control\SecurityProviders\SCHANNEL\Protocols\SSL 3.0]
[HKEY_LOCAL_MACHINE\SYSTEM\CurrentControlSet\Control\SecurityProviders\SCHANNEL\Protocols\SSL 3.0\Server]
"Enabled"=dword:00000000
"DisabledByDefault"=dword:00000001
[HKEY_LOCAL_MACHINE\SYSTEM\CurrentControlSet\Control\SecurityProviders\SCHANNEL\Protocols\TLS 1.0]
[HKEY_LOCAL_MACHINE\SYSTEM\CurrentControlSet\Control\SecurityProviders\SCHANNEL\Protocols\TLS 1.0\Server]
"Enabled"=dword:ffffffff
"DisabledByDefault"=dword:00000000
[HKEY_LOCAL_MACHINE\SYSTEM\CurrentControlSet\Control\SecurityProviders\SCHANNEL\Protocols\TLS 1.1]
[HKEY_LOCAL_MACHINE\SYSTEM\CurrentControlSet\Control\SecurityProviders\SCHANNEL\Protocols\TLS 1.1\Server]
"Enabled"=dword:ffffffff
"DisabledByDefault"=dword:00000000
[HKEY_LOCAL_MACHINE\SYSTEM\CurrentControlSet\Control\SecurityProviders\SCHANNEL\Protocols\TLS 1.2]
[HKEY_LOCAL_MACHINE\SYSTEM\CurrentControlSet\Control\SecurityProviders\SCHANNEL\Protocols\TLS 1.2\Server]
"Enabled"=dword:ffffffff
"DisabledByDefault"=dword:00000000

Change cipher order and remove unsafe ciphers:

Open gpedit.msc =>> go to Administrative Templates =>> Network =>> SSL Configuration Settings =>> double click SSL Cipher Suite Order.


In the SSL Cipher Suite Order screen select "Enabled" and under options select and delete everything in that text field.


Then copy this line in that text field:

TLS_ECDHE_ECDSA_WITH_AES_128_GCM_SHA256_P521,TLS_ECDHE_ECDSA_WITH_AES_128_GCM_SHA256_P256,TLS_ECDHE_ECDSA_WITH_AES_128_CBC_SHA256_P521,TLS_ECDHE_ECDSA_WITH_AES_128_CBC_SHA256_P256,TLS_ECDHE_ECDSA_WITH_AES_256_GCM_SHA384_P521,TLS_ECDHE_ECDSA_WITH_AES_256_CBC_SHA384_P521,TLS_ECDHE_RSA_WITH_AES_128_CBC_SHA256_P521,TLS_ECDHE_RSA_WITH_AES_128_CBC_SHA256_P384,TLS_ECDHE_RSA_WITH_AES_128_CBC_SHA256_P256,TLS_ECDHE_RSA_WITH_AES_256_CBC_SHA384_P521,TLS_ECDHE_RSA_WITH_AES_256_CBC_SHA384_P256,TLS_RSA_WITH_AES_128_CBC_SHA256,TLS_RSA_WITH_AES_256_CBC_SHA256,TLS_ECDHE_ECDSA_WITH_AES_128_CBC_SHA_P521,TLS_ECDHE_ECDSA_WITH_AES_128_CBC_SHA_P256,TLS_ECDHE_ECDSA_WITH_AES_256_CBC_SHA_P521,TLS_ECDHE_ECDSA_WITH_AES_256_CBC_SHA_P256,TLS_ECDHE_RSA_WITH_AES_128_CBC_SHA_P521,TLS_ECDHE_RSA_WITH_AES_128_CBC_SHA_P256,TLS_ECDHE_RSA_WITH_AES_256_CBC_SHA_P521,TLS_ECDHE_RSA_WITH_AES_256_CBC_SHA_P256,TLS_RSA_WITH_RC4_128_SHA,TLS_RSA_WITH_AES_256_CBC_SHA,TLS_RSA_WITH_AES_128_CBC_SHA

Click "Apply" and "OK".

Now you have to reboot the server in order to activate these changes,
After the reboot go to https://www.ssllabs.com/ssltest/ and see if you get any errors or warnings.

Another way to do this is by using IISCrypto by Nartac Software, this freeware does the same but in a GUI. But for some reason it didn't do what i axpected it to do, so this way you can do it manually.

13 October 2015

Get-WinEvent from multiple servers Super Fast!

In the past I created a script to pull event log errors and warnings into a file and email the results.

This script stopped working, and after some digging I found that it added all the same events in every log file and combined that in to one file, which got very big. So big that it didn't get delivered to my mailbox, it got up to 75MB way above our send/receive quota. It also ran for 2 hours, while this one runs under 2 minutes!

I found several scripts/howto's and kb article's to get what I wanted and combined those in one script.
There seems to be a strange problem with Get-WinEvents, -ComputerName doesn't accept array input. So i had to write a one liner and repeat that for every server twice, one for the "System log" and one for the "Application log".

It writes 2 files per server, and collects warnings and errors only. On every run it overwrites the old file so there is no history. I made a simple webpage to quickly check the application log or the system log. You should be able to do this yourself in Word for instance.

This is what I came up with:

$ShareName = "\\domain.lan\Eventlogs"
$Date = (get-date) - (new-timespan -day 1)
$SystemLogName = "System"
$AppLogname = "Application"
$now = Get-Date -Format g
$style = "<style>BODY{font-family: Arial; font-size: 10pt;}"
$style = $style + "TABLE{border: 1px solid black; border-collapse: collapse;}"
$style = $style + "TH{border: 1px solid black; background: #dddddd; padding: 5px; }"
$style = $style + "TD{border: 1px solid black; padding: 5px; }"
$style = $style + "</style>"

# Exchange
Get-WinEvent -FilterHashTable @{LogName='Application'; Level=1,2; StartTime=$date} -ErrorAction SilentlyContinue -ComputerName sr-XXXXX | Select-Object MachineName,TimeCreated,LogName,ProviderName,Id,LevelDisplayName,Message | ConvertTo-HTML -head $style -body "<H2>System log Report From Server SR-XXXXX $now</H2>" | Out-File "$ShareName\SR-XXXXX-$AppLogName.html"
Get-WinEvent -FilterHashTable @{LogName='System'; Level=1,2; StartTime=$date} -ErrorAction SilentlyContinue -ComputerName sr-XXXXX | Select-Object MachineName,TimeCreated,LogName,ProviderName,Id,LevelDisplayName,Message | ConvertTo-HTML -head $style -body "<H2>System log Report From Server SR-XXXXX $now</H2>" | Out-File "$ShareName\SR-XXXXX-$SystemLogName.html"
# Citrix
Get-WinEvent -FilterHashTable @{LogName='Application'; Level=1,2; StartTime=$date} -ErrorAction SilentlyContinue -ComputerName sr-XXXXX | Select-Object MachineName,TimeCreated,LogName,ProviderName,Id,LevelDisplayName,Message | ConvertTo-HTML -head $style -body "<H2>System log Report From Server SR-XXXXX $now</H2>" | Out-File "$ShareName\SR-XXXXX-$AppLogName.html"
Get-WinEvent -FilterHashTable @{LogName='System'; Level=1,2; StartTime=$date} -ErrorAction SilentlyContinue -ComputerName sr-XXXXX | Select-Object MachineName,TimeCreated,LogName,ProviderName,Id,LevelDisplayName,Message | ConvertTo-HTML -head $style -body "<H2>System log Report From Server SR-XXXXX $now</H2>" | Out-File "$ShareName\SR-XXXXX-$SystemLogName.html"

16 December 2014

Schedule a PowerShell script with task scheduler

For all your status emails that you want to run every day the task scheduler is your friend, well sort of.
Sometimes i just can't understand why it throws errors at me.
I found a nice article about this over at Dmitry's blog.

1. Get your script ready
Surprising as it might sound, your script might actually not be ready to run in a scheduled task as is. This happens if it uses cmdlets from a particular PowerShell module or snapin, and it worked for you interactively because you used a specialized shell (e.g. Exchange Management Shell) or a tool like PowerGUI Script Editor which loads the modules for you.
If you indeed are using using any non-default cmdlets, simply add Add-PSSnapin or Import-Module to the beginning of the script. For example:

Add-PSSnapin Quest.ActiveRoles.ADManagement
2. Schedule the task
To schedule a task simply start Windows Task Scheduler and schedulepowershell.exe executable passing the script execution command as a parameter. The -File parameter is the default one so simply specifying the script path as the argument would work in a lot of cases:
You can find powershell.exe in your system32\WindowsPowerShell\v1.0 folder.
4. Report task success or failure
If you want your script to report success or failure (or some sort of other numerical result) simply use the exit keyword in the script to pass the value, e.g.:
exit 4
Then your Windows Task Scheduler will show the value in the Last Run Result (you might need to hit F5 to refresh the column in the task scheduler):
3. Passing parameters
If you need to pass parameters things get a little trickier. Say, you have a script which adds two numbers:
param($a=2, $b=2)
"Advanced calculations ahead"
exit $a + $b
To pass the numbers as parameters, you would want to use powershell.exe -Command instead of powershell.exe -File. This -Command argument will then have the script invocation operator &, path to the script, and the parameters. E.g.:
Program:C:\Windows\System32\WindowsPowerShell\v1.0\powershell.exe Add argument (optional): -Command "& c:\scripts\hello.ps1 -a 2 -b 3"
If you want to also get your exit code from the script, you would need to re-transmit that by adding exit $LASTEXITCODE to the command (I learnt this tip from MoW). E.g.
Program:C:\Windows\System32\WindowsPowerShell\v1.0\powershell.exe Add argument (optional): -Command "& c:\scripts\hello.ps1 -a 2 -b 3; exit $LASTEXITCODE"
5. Run x86 PowerShell on x64 Windows
On 64-bit versions of Windows you actually have both 64-bit and 32-bit versions of PowerShell. In most cases you don’t care but in some cases (e.g. specific COM objects being used) you might need specifically a 32-bit version. To get that to run, simply pick the proper executable when you schedule the task:
Regular PowerShell (64-bit version on 64-bit Windows):%SystemRoot%\system32\WindowsPowerShell\v1.0\powershell.exe
32-bit PowerShell (x86):%SystemRoot%\syswow64\WindowsPowerShell\v1.0\powershell.exe
6. Other options
To learn about all parameters PowerShell executable has simply run it with /? option (from either cmd.exe or a PowerShell session).
I normally use -noprofile to make sure that nothing in the PowerShell profile interferes with the task.
Also, if your Execution Policy does not allow running scripts the -ExecutionPolicy parameter comes handy allowing you to make an exception just for this task. E.g.:
c:\Windows\System32\WindowsPowerShell\v1.0\powershell.exe -NoProfile -File c:\scripts\hello.ps1 -ExecutionPolicy RemoteSigned
Here are some other parameters provided by PowerShell:
-PSConsoleFile
    Loads the specified Windows PowerShell console file. To create a console
    file, use Export-Console in Windows PowerShell.
I guess you could use that is you want the exact environment you have in the predefined shell from Exchange, AD, or SQL. E.g.: PowerShell -PSConsoleFile SqlSnapIn.Psc1
-Version
    Starts the specified version of Windows PowerShell.
I don’t think this one actually works.
-NoLogo
Hides the copyright banner at startup.
Not really relevant for scheduled tasks, imho…
-NoExit
    Does not exit after running startup commands.
Might be useful for troubleshooting.
-Sta
    Start the shell using a single-threaded apartment.
If your script needs STA mode (if you don’t know what this is – most likely you don’t need this. ;))
-NonInteractive
    Does not present an interactive prompt to the user.
Not really relevant for scheduled tasks, imho…
-InputFormat
    Describes the format of data sent to Windows PowerShell. Valid values are
    "Text" (text strings) or "XML" (serialized CLIXML format).

-OutputFormat
    Determines how output from Windows PowerShell is formatted. Valid values
    are "Text" (text strings) or "XML" (serialized CLIXML format).
-WindowStyle
    Sets the window style to Normal, Minimized, Maximized or Hidden.
Unfortunately, I could not make this work. I tried to use -WindowStyle Hiddento avoid the PowerShell console window popping up during task execution but with no luck.
-EncodedCommand
    Accepts a base-64-encoded string version of a command. Use this parameter
    to submit commands to Windows PowerShell that require complex quotation
    marks or curly braces.

    # To use the -EncodedCommand parameter:
    $command = 'dir "c:\program files" '
    $bytes = [System.Text.Encoding]::Unicode.GetBytes($command)
    $encodedCommand = [Convert]::ToBase64String($bytes)
    powershell.exe -encodedCommand $encodedCommand
Can be useful when having to pass advanced expressions and getting issues with parser.

02 December 2014

Check WAN IP address at icanhazip.com and mail the results

Since my ISP had planned maintenance last week, i couldn't access my boxes at home from the internet. My WAN IP address had changed. This happens once a year maybe but it's annoying enough to make something for it.

I found a great script from Leon van Efferen, but it didn't do exactly what i needed so i modified it a bit.

First off the check against whatismyip.com didn't work anymore, so i modified that to check against icanhazip.com.

Which by the way you can also do from Powershell directly:
(Invoke-WebRequest icanhazip.com).Content.Trim()
Then i wanted to receive an email everyday just to know it's still working and to be able to check my IP address always, not only if it changes.

This is what i came up with:
###########################################################################
#
# NAME:  CheckWANIP 
#
# COMMENT: Check the WAN IP Address based on ifconfig.me Automation page
#   and e-mail a message .
#
###########################################################################

#Set Target Domain
$TargetDomain = "domain.com" #Enter your FQDN that is linked to your WAN ip address

Function SendMail {
$EmailFrom = "IPCheck@domain.com" #Enter the e-mail address it should send the message from.
$EmailTo = "user@domain.com" #Enter the e-mail address it should send the message to.
$Subject = "External IP Address at icanhazip.com is $current_WAN_IP" #Enter your subject the e-mail message should contain.
$Body = "Compare the IP addresses from domain.com $DNS_WAN_IP and DNS records from ifconfig.me $Current_WAN_IP"  #Enter the message that the e-mail should contain.
$SMTPServer = "smtp.gmail.com" #Enter the FQDN of your SMTP server eg. smtp.gmail.com
$SMTPClient = New-Object Net.Mail.SmtpClient($SmtpServer, 25) #Enter your SMTP Port eg. 587
$SMTPClient.EnableSsl = $false # Change to $false if you don't want to use SSL
$SMTPClient.Send($EmailFrom, $EmailTo, $Subject, $Body)
}

# Do not change anything below this line.
$DNS_WAN_IP = [System.Net.Dns]::GetHostAddresses("$TargetDomain") | select-object IPAddressToString -expandproperty  IPAddressToString
Write-host "Resolved IP Address of $TargetDomain = $DNS_WAN_IP" 
$Current_WAN_IP = (Invoke-WebRequest icanhazip.com).Content.Trim()
Write-host "Current WAN IP Address = $Current_WAN_IP"
SendMail
Write-host "Sending email"
exit

Then you can schedule it as a daily task:
Powershell.exe "& 'C:\path to script\CheckWANIP.ps1'"

10 September 2014

Using Hyper-V with a Wireless Network Adapter

Out of the box Hyper-V does not support connecting virtual machines to wireless network adapters.  As a primarily server focused product this is a reasonable limitation - especially given that we need to do to get wireless network adapters to work with virtual machines.  But all is not lost - it is possible to setup an internal virtual network and utilize Internet Connection Sharing to get you up and going.
The first thing to do is to create a new internal virtual network switch:
  1. Open the Hyper-V Manager and select your server.
  2. Select Virtual Network Manager... from the action pane (on the right).
  3. Select New virtual network and choose to Add an Internal network.
  4. Give the new virtual network the name you want hit OK.
Now to setup Internet Connection Sharing:
  1. Open the Control Panel and open Network and Sharing Center.
  2. Select Manage network connections from the list on the left.
  3. Locate the icon for your wireless network adapter, right click on it and select Properties.
  4. Change to the Sharing tab.
  5. Check Allow other network users to connect through this computer's Internet connection.
  6. If you have multiple network adapters you will need to select the specific entry for the internal virtual network switch.
  7. Click OK.
You can now connect virtual machines to the internal virtual network and allow them to access the Internet through your wireless network adapter.

Source

30 August 2014

Windows server 2012 task manager missing disk and network performance counters

I keep reading on some fora that this setting should not be used in a production envoironment, so try at your own risk or test first. 

Enabling Task manager Disk Performance Counters
 

  1. Ensure Task Manager is closed.
     
  2. Launch the Command Prompt using the "Run as Administrator" option.
     
  3. Enter the following at the Command Prompt:
     
    diskperf -Y
     
  4.  Hit Enter.
     
  5. Close the Command Prompt.
     
  6. Re-open the Task Manager

25 August 2014

Resolving DirectAccess Connectivity Issues

The NRPT

Direct Access utilizes a feature called the Name Resolution Policy Table (NRPT). This basically controls the way DirectAccess handles name resolution for specific Domains. Entries in the NRPT control where client machines look for name resolution on specific domains and allow finer control of what happens when client machines are utilizing DirectAccess for connectivity. For instance, you can utilize the NRPT to force client machines to look to external DNS servers for resolution on some hostnames or domain zones, while looking to internal DNS for everything else and vice versa. There are really only two ways to modify the NRPT, through the Registry (I don’t recommend modifying the NRPT through the registry), and through group Policy using the Name Resolution Policy node. Technet has some information on how to handle NRPT here: NRPT

The Problem with DirectAccess Failures

Usually when DirectAccess stops communicating, it stops working because the NRPT isn’t configured properly. If this happens, you may run into a situation where some systems are unable to ping domain controllers or other systems by using NetBIOS names or through FQDNs. This can be a huge problem, because if DirectAccess fails, systems will typically no longer be able to communicate with the Domain to retrieve corrected NRPT information, since this information is deployed via GPO.

Fixing the Communication Issue

If something causes your DirectAccess configuration on a client machine to corrupt or if Direct Access isn’t properly configured, it may be necessary to reset the NRPT on the client machine to fix the problem. The only way to modify the NRPT on a client machine is through the registry. If you’re experienced enough with DirectAccess, you may be able to resolve the issue directly in the registry. However, it is usually easier to just remove the existing NRPT entries on the client machine entirely. This has to be done in the registry at the following location: HKLM\Software\Policies\Microsoft\Windows NT\DNSClient\DNSPolicyConfig (Pictured below)

NRPTreg

Note the two entries there. Both are composed of DA-{GUID}. DA stands for DirectAccess. Remove any entries that have that DA- prefix and reboot. Once this is done, the system will begin communicating without DirectAccess and will have the ability to connect to the domain to retrieve new NRPT information if it is available.

After deleting the entries, you can either reboot or restart the DNS client service and do a gpupdate /force.

Source

09 July 2014

Get system up time script and alternative ways

Save as a ps1 script, and run.

$computer = "computername"

$lastboottime = (Get-WmiObject -Class Win32_OperatingSystem -computername $computer).LastBootUpTime

$sysuptime = (Get-Date) – [System.Management.ManagementDateTimeconverter]::ToDateTime($lastboottime) 
  
Write-Host "$computer has been up for: " $sysuptime.days "days" $sysuptime.hours "hours" $sysuptime.minutes "minutes" $sysuptime.seconds "seconds" 

Outputs like:

PS D:\_DATA\Scripts> .\Uptime.ps1
computername has been up for:  71 days 4 hours 26 minutes 50 seconds

Alternatives:

1. Go to "Start" -> "Run".

2.  Write "CMD" and press on "Enter" key.

3. Write the command systeminfo | find "up time" and press on "Enter" key.

1. Go to "Start" -> "Run".

2.  Write "CMD" and press on "Enter" key.

3.  Write the command "net statistics server" and press on "Enter" key.


4.  The line that start with "Statistics since …" provides the time that the server was up from.

  •   The command "net stats srv" can be use instead.
Uptime.exe Tool Allows You to Estimate Server Availability with Windows NT 4.0 SP4 or Higher

Source

Alternate source

05 June 2014

Powershell 407 proxy authentication required

When trying to run Get-Software.ps1, you may receive an error message:

Do you want to Download PSExec ?
[Y] Yes  [N] No  [?] Help (default is "Y"): y
Exception calling "DownloadFile" with "2" argument(s): "The remote server retur
ned an error: (407) Proxy Authentication Required."
At D:\_DATA\Downloads\Hydrationkit\Build\Modules\Software.psm1:83 char:33
+                                 $WebClient.DownloadFile($Source, $Destination
)
+                                 ~~~~~~~~~~~~~~~~~~~~~~~~~~~~~~~~~~~~~~~~~~~~~
~
    + CategoryInfo          : NotSpecified: (:) [], MethodInvocationException
    + FullyQualifiedErrorId : WebException

Run these commands to send your current credentials

$proxy = New-Object System.Net.WebClient

$Proxy.Proxy.Credentials = [System.Net.CredentialCache]::DefaultNetworkCredentials

After this the script runs fine:

Do you want to Download PSExec ?
[Y] Yes  [N] No  [?] Help (default is "Y"):

Do you want to Download SetupCA ?
[Y] Yes  [N] No  [?] Help (default is "Y"):

Do you want to Download Windows Assessment and Deployment Kit (ADK) for
Windows® 8 ?
[Y] Yes  [N] No  [?] Help (default is "Y"):


14 March 2014

What are "Schannel" errors and how to stop logging them

With certain Microsoft products, such as Exchange and Lync you see your evelogs filling up with "Schannel" errors; event id: 36888 The following fatal alert was generated: 51. The internal error state is 1306.

The event it self doesnt give out a lwhole lot of information but here is an explanation for it from technet:

When you enable Schannel event logging on a computer that is running Microsoft Windows NT Server 4.0, Microsoft Windows 2000 Server, Microsoft Windows XP Professional, Microsoft Windows Server 2003, Microsoft Windows Server 2008, or Microsoft Windows Server 2008 R2, detailed information from Schannel events can be written to the Event Viewer logs, in particular the System event log. This article describes how to enable and configure Schannel event logging. 


The internal error state is 1203 - From a support forum: "This event is seen on windows 2008 R2 running IIS. If a user tries to access a web site using HTTP but specifies an SSL port in the URL then this event is logged. This event is expected as the client is trying to use the wrong port or the wrong protocol to access the site
The error 1203 indicates invalid ClientHello from the client. This is by design and you can ignore this warning."

If your System eventlog is filling up with "Schannel" errors, and you want to stop this behavior, you can do the following.

Enable /disable logging

Warning Serious problems might occur if you modify the registry incorrectly by using Registry Editor or by using another method. These problems might require that you reinstall your operating system. Microsoft cannot guarantee that these problems can be solved. Modify the registry at your own risk.

Note This registry key is present already in Windows 2000 and XP Professional.
  1. Start Registry Editor. To do this, click Start, click Run, type regedt32, and then click OK.
  2. Locate the following key in the registry:
    HKEY_LOCAL_MACHINE\System\CurrentControlSet\Control\SecurityProviders\SCHANNEL
  3. On the Edit menu, click Add Value, and then add the following registry value:
    Value Name: EventLogging
    Data Type: REG_DWORD
    Note After you add this property, you must give it a value. See the table in the "Logging options" section to obtain the appropriate value for the kind of events that you want to log.
  4. Exit Registry Editor.
  5. Click Start, click Shut Down, click to select Restart, and then click OK to restart the computer. (Logging does not take effect until after you restart the computer).

Logging options

The default value for Schannel event logging is 0x0000 in Windows NT Server 4.0, which means that no Schannel events are logged. In Windows 2000 Server and Windows XP Professional, this value is set to 0x0001, which means that error messages are logged. Additionally, you can log multiple events by specifying the hexadecimal value that equates to the logging options that you want. For example, to log error messages (0x0001) and warnings (0x0002), set the value to 0x0003.
Collapse this tableExpand this table:

ValueDescription
0x0000                  Do not log
0x0001                  Log error messages
0x0002                  Log warnings
0x0004                  Log informational and success events

Source


05 March 2014

VSS Writer showing retryable error and how to reset them

When backups fail with exchange, one of the first things i look for are the VSS writers.
These writers create a snapshot function for Windows and third party backup products.

If the status shown is "Retryable error", "Waiting for completion" and a status other than "Stable" things might go wrong.
I say might because the error shown is the writers last state, not the actual state.

To check the status in a command box:

vssadmin list writers

To check the status in Powershell:


& vssadmin list writers | Select-String -Context 0,4 '^writer name:' | ? {
  $_.Context.PostContext[2].Trim() -ne "state: [1] stable" -or
  $_.Context.PostContext[3].Trim() -ne "last error: no error"
}

Or:

vssadmin list writers | fl name,state,last*

All show this output:

PS C:\> vssadmin list writers | fl name,state,last*
vssadmin 1.1 - Volume Shadow Copy Service administrative command-line tool
(C) Copyright 2001-2005 Microsoft Corp.

Writer name: 'Task Scheduler Writer'
   Writer Id: {d61d61c8-d73a-4eee-8cdd-f6f9786b7124}
   Writer Instance Id: {1bddd48e-5052-49db-9b07-b96f96727e6b}
   State: [1] Stable
   Last error: No error

Writer name: 'VSS Metadata Store Writer'
   Writer Id: {75dfb225-e2e4-4d39-9ac9-ffaff65ddf06}
   Writer Instance Id: {088e7a7d-09a8-4cc6-a609-ad90e75ddc93}
   State: [1] Stable
   Last error: No error

Writer name: 'Performance Counters Writer'
   Writer Id: {0bada1de-01a9-4625-8278-69e735f39dd2}
   Writer Instance Id: {f0086dda-9efc-47c5-8eb6-a944c3d09381}
   State: [1] Stable
   Last error: No error

To resolve the error and get back to a healthy writer state, you could do one of the following:


  • Restart your server
  • Reboot the corresponding service (see the table below)

VSS WriterService NameService Display Name
ASR WriterVSSVolume Shadow Copy
BITS WriterBITSBackground Intelligent Transfer Service
COM+ REGDB WriterVSSVolume Shadow Copy
DFS Replication service writerDFSRDFS Replication
DHCP Jet WriterDHCPServerDHCP Server
FRS WriterNtFrsFile Replication
FSRM writersrmsvcFile Server Resource Manager
IIS Config WriterAppHostSvcApplication Host Helper Service
IIS Metabase WriterIISADMINIIS Admin Service
Microsoft Exchange Writer
MSExchangeIS
MSExchangeRepl
Microsoft Exchange Information Store
Microsoft Exchange Replication
Microsoft Hyper-V VSS WritervmmsHyper-V Virtual Machine Management
NTDSNTDSActive Directory Domain Services
OSearch VSS WriterOSearchOffice SharePoint Server Search
OSearch14 VSS WriterOSearch14SharePoint Server Search 14
Registry WriterVSSVolume Shadow Copy
Shadow Copy Optimization WriterVSSVolume Shadow Copy
SPSearch VSS WriterSPSearchWindows SharePoint Services Search
SPSearch4 VSS WriterSPSearch4SharePoint Foundation Search V4
SqlServerWriterSQLWriterSQL Server VSS Writer
System WriterCryptSvcCryptographic Services
TermServLicensingTermServLicensingRemote Desktop Licensing
WMI WriterWinmgmtWindows Management Instrumentation


I will be trying to get a script to check, report and restart the corresponding service for this.
Stay tuned.