31 March 2017

Get-HealthReport - Get your daily dose of builtin Exchange HealthReport checks in your mailbox

Fooking for some stuff about Skype for Business I came across a great post by Joakim Storrank over at https://sysadminblogger.wordpress.com/

He had a few scripts he uses for monitoring, 2 he mentions I use as well but the third caught my eye.

It was a great oneliner (gotta love those) about the builtin HealthReport checks for Exchange.
The thing is that it was for 1 server and I have several so I made some adjustments and look here now it can be used for an array of servers.

Thanks Joakim, and check out his post about the Health Checking / Monitoring Exchange Server 2013/2016

Run it as a scheduled task daily with these arguments:
powershell.exe -noprofile - file "C:\_Scripts\Get-HealthReport\Get-HealthReport.ps1"

Note the spaces around "Style" for the table, I had some trouble getting the code to display correctly.

The Script:
##############################################################################            
## Get-HealthReport            
## Purpose: Sends report on the builtin Exchange HealthReport commandlets            
## Author: Edwin van Brenk            
## Date: 30 march 2017            
## Version: 1.0            
## Credits go to Joakim Storrank for his excellent oneliner: 
## https://sysadminblogger.wordpress.com/2017/03/13/health-checking-monitoring-exchange-server-20132016/            
##############################################################################            
#Load Exchange 2013 Module             
Add-PSSnapin Microsoft.Exchange.Management.PowerShell.SnapIn            
            
#SMTP options for sending the report email            
$smtpServer = "smtp.domain.com"            
$smtpFrom = "Get-HealthReport@domain.com"            
$smtpTo = "username@domain.com"            
$messageSubject = "Get-HealthReport $Computers"            
            
$logPath = "C:\_Scripts\Get-HealthReport\"            
            
# Build table for html files, remove the space around "Style"            
$style = "< style >BODY{font-family: Arial; font-size: 10pt;}"            
$style = $style + "TABLE{border: 1px solid black; border-collapse: collapse;}"            
$style = $style + "TH{border: 1px solid black; background: #dddddd; padding: 5px; }"            
$style = $style + "TD{border: 1px solid black; padding: 5px; }"            
$style = $style + "</ style >"            
# End HTML Output file style            
            
$Date = Get-Date -Format dd-MM-yyyy            
            
## The Servers to test            
$Computers = "server1","server2","server3","server4"
            
# Start the Script            
Foreach($computer in $Computers)            
{            
# Choose what you want to see, all status' or everything but healthy or everything but healthy and disabled by commenting out the desired line            
#$GetStuff = Get-HealthReport -Server $Computer | Select server,state,healthset,alertvalue,lasttransitiontime,monitorcount #-AutoSize            
#$GetStuff = Get-HealthReport -Server $Computer | where {$_.alertvalue -ne “Healthy” -and $_.AlertValue -ne “Disabled”}  | Select server,state,healthset,alertvalue,lasttransitiontime,monitorcount #-AutoSize            
$GetStuff = Get-HealthReport -Server $Computer | where {$_.alertvalue -ne “Healthy”} | Select server,state,healthset,alertvalue,lasttransitiontime,monitorcount #-AutoSize            
$GetStuff | ConvertTo-Html -head $style -body "Get-HealthReport from $Computer" | Out-File "$logPath\$Computer-$Date.html"            
}            
            
# Remove previously created combined.html            
Remove-Item $logPath\combined.html            
#Combine all the html files in to one file               
Get-Content -path $logPath\*.html | Add-Content -Path $logPath\combined.html            
            
#Send email message            
Send-Mailmessage -To $smtpto -From $smtpfrom -SmtpServer $smtpserver -Subject $messagesubject -Body (Get-Content $logpath\combined.html | Out-String) -BodyasHtml            
# Remove all html files to prevent filling the disk            
Remove-Item $logpath\*.html

14 March 2017

Skype Online New-CsOnlineSession - Create a shortcut for your Online Sessions

The way to connect to Skype Online according to Microsoft:

Import-Module SkypeOnlineConnector            
            
$cred = Get-Credential            
            
$CSSession = New-CsOnlineSession -Credential $cred            
            
Import-PSSession $CSSession -AllowClobber

While this works, it can be done faster:

Create a RemoteSkypeOnlineSession.ps1 file and paste the above in it and save it preferably in OneDrive.
Then on your desktop create new shortcut and point the source to the saved file in OneDrive.


Adjust the "Target" with this:
C:\Windows\System32\WindowsPowerShell\v1.0\powershell.exe -noexit -command ". 'C:\Users\YourUsername\OneDrive\PowerShell\RemotePSSession\RemoteSkypeOnlineSession.ps1'"

When the Shortcut has been edited shift right click it and select "Run as a Administrator".
Enter your credentials and the PowerShell console will load the Exchange command-lets.

When you're finished with the session don't forget to exit the session, otherwise all the Powershell session will be used and there will be none left when you try to start another session.
There are 3 sessions per Admin account, and a total of 9 sessions per tenant.

Get-Psssession | fl id,session            
            
Remove-Psssession - id id-number  

Or use:        
            
Remove-psssession -name Sessionname


Skype Online authenticating proxy - 407 Proxy Authentication Required

When trying to sign in to Skype Online from the Skype for Business (2015) Control panel sitting behind an authenticating proxy you may receive the following:


You need to setup your proxy to allow the nececsary sites to be accessed without authentication.
Going through your proxy log you can see what sites are connected to.
These are the once that where accessed at my site. 

*.online.lync.com
*.microsoftonline.com
*.microsoftonline-p.net
*.microsoftonline-p.com
*.windows.net
*.office365.com
signup.microsoft.com

Yours could be different, there are quite a lot of sites and ip addresses linked with Skype Online, Office365 and Exchange Online as you can see here:

Office-365-URLs-and-IP-address-ranges

After allowing all these sites through your proxy you should be able to login to Skype Online with your tenant ID.


28 February 2017

Windows 10 Store not opening

When clicking the Store app in Windows 10 (version 1607) nothing happens.
This could be because of the anniversary update.

There are several method to resolve this, for me number 4 worked.

Possible solution 1

Right-click the start button, select "Command prompt (Admin)" and type wsreset.exe. Didn't work for me, I was getting: "You'll need a new app to open this ms-windows-store".
A possible error that you can get is this:


Possible solution 2

Start an elevated PowerShell:
Set-ExecutionPolicy Unrestricted -Force

And then
Add-AppxPackage -DisableDevelopmentMode -Register $Env:SystemRoot\WinStore\AppxManifest.XML

Didn't work for me either. I got this:Cannot find path 'C:\WINDOWS\WinStore\AppxManifest.XML' because it does not exist.
I simply had no "WinStore" folder in my "C:\Windows". Possibility for this is that the WinStore folder is located in "C:\Program Files\WindowsApps"

Possible solution 3

Start an elevated PowerShell:
Set-ExecutionPolicy Unrestricted -Force

For me it was this that worked:
Get-AppXPackage | Foreach {Add-AppxPackage -DisableDevelopmentMode -Register "$($_.InstallLocation)\AppXManifest.xml"}
For others it could be this:
Get-AppXPackage -AllUsers | Foreach {Add-AppxPackage -DisableDevelopmentMode -Register "$($_.InstallLocation)\AppXManifest.xml"}

Finally, it worked.

If none of the above solutions works for you - create a new administrator user and repeat the steps under the new account. You will have to transfer all the existing data to the new user profile from the old one.

To remove the Store completely:
Get-AppxPackage -AllUsers | Remove-AppxPackage
Find the Windows Store Location:
Get-AppxPackage -AllUsers
To reinstall the Windows 10 Store:
Add-AppxPackage -DisableDevelopmentMode -Register "C:\Program Files\WindowsApps\Microsoft.WindowsStore_11602.1.26.0_x64__8wekyb3d8bbwe\AppXManifest.xml"

14 February 2017

Load Exchange 2013 PowerShell Cmdlets when starting PowerShell ISE everytime

Start PowerShell ISE with an account that has administrative privileges.CAUTION: Make sure that you start Windows PowerShell ISE, which is 64-bit, rather than Windows PowerShell ISE (x86) which is 32-bit.


Enter the command test-path $profile. This will either return a True or a False.
If it returns False then you can create a profile for yourself using the following command.

if (!(test-path $profile)) {new-item -type file -path $profile -force}

The path to the profile is provided, e.g. C:\Users\SP_Admin\Documents\WindowsPowerShell. The name of the file is also provided, e.g. Microsoft.PowerShellISE_profile.ps1.


Open the .ps1 file in Notepad. The file will be blank. Enter the following command and then save the file (File, Save). Make sure that the file is saved with the original .PS1 extension and not .txt.

Add-PSsnapin *Exchange* -ErrorAction SilentlyContinue

Close and restart the PowerShell ISE. Your Exchange PowerShell cmdlets should now be available to you. Verify this by typing any Exchange PowerShell cmdlet. For example type the following command.
Get-ExchangeServer | fl name,edition,admindisplayversion

And you can add some other's ofcourse:
Import-Module IsePackV2 -Force

12 February 2017

Steps for renewing NDES Service Certificates

Well this was a life saver once again, being on vacation the moment this was implemented, and the supplied documentation by the 3rd party that did that being insufficient, this saved my a s s.
And as stated by the blogger "chdelay" there's not a lot of info to be found on this matter.


For those organizations that used the Network Device Enrollment Service run into the process for renewing the certificates for NDES. I never was able to find good instructions on how to do this. So, I had no choice but to create my own. The steps in this blog posting cover how to renew the certificates used by the Network Device Enrollment Service. You will need to be logged in as an Enterprise Admin for most of the steps outlined in this posting.

Step 1: First give the NDES Server Read and Enroll permission to the CEP Encryption Certificate Template.

Step 2: Open the certificates MMC targeted to the computer.  Expand Personal.  Right-click on Certificates.  From the context menu select All Tasks then Renew Certificate with New Key…

Step 3: On the Before You Begin page of the wizard, click Next.

Step 4: On the Request Certificates page, click Enroll.

Step 5: On the final page of the wizard, click Finish.

Step 6: Open Certmgr.msc as a user that has Read and Enroll permissions to the Exchange Enrollment Certificate Template.  Expand Personal, right click on Certificates.  Select All Tasks, and then Request New Certificate…

Step 7: On the Before You Begin page, click Next.

Step 8: On the Select Certificate Enrollment Policy page, click Next.

Step 9: Select the Exchange Enrollment Agent certificate template, and click the More information is required to enroll for this certificate. Click here to configure settings. link.

You will want to user the same Subject Name that is in your current Exchange Enrollment certificate. The following steps illustrate the steps needed to do this. You can find the current subject name by opening the Certificates MMC targeted to the local machine and then open the existing Exchange Enrollment Agent certificate. In my example the name was CN=FCNDES01-MSCEP-RA,C=US.

Step 10: Under Subject Name ensure that Common Name is selected and under Value enter the common name that is in your existing certificate. Then click Add.

Step 11: Change the Type to Country and under Type the country code that is your existing Exchange Enrollment Agent certificate.

Step 12: Click Add

Step 13: On the Private Key tab, select Make private key exportable.  Then click OK.

Step 14: Then click Enroll.

Step 15: Right-click on the Exchange Enrollment certificate in the users personal store.  Select Export…

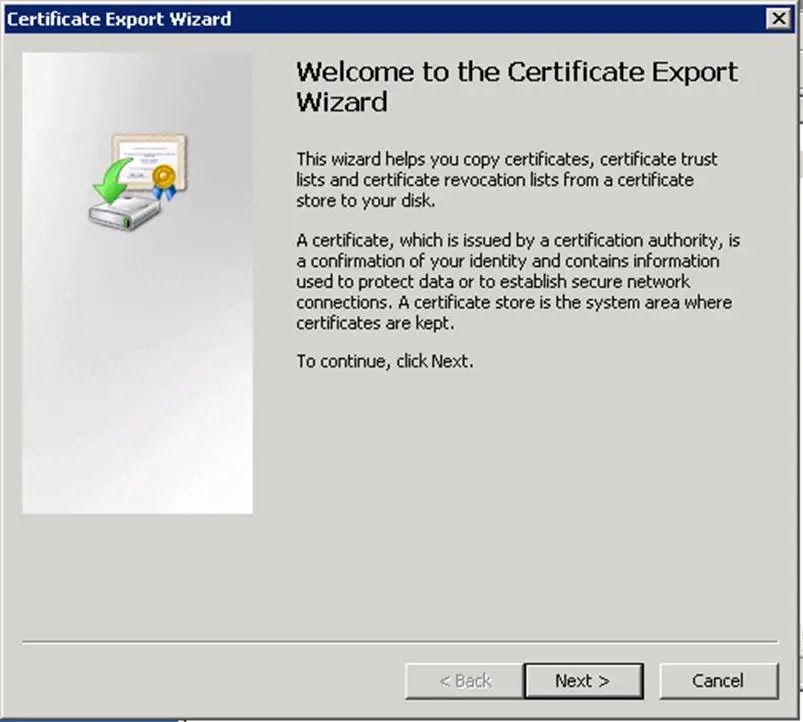
Step 16: When the Certificate Export Wizard opens, click Next.

Step 17: On the Export Private Key page, select Yes, export the private key.

Step 18: On the Export File Format page, select Personal Information Exchange – PKCS #12 (.PFX)

Step 19: On the Password page, enter a password and click Next.

Step 20: On the File to Export page, click the Browse… button.  Select the file name and save location.  When finished click Next.

Step 21: On the final page of the wizard, click Finish.

Step 22: Then click OK.

Step 23: In the Certificate MMC on the NDES Server that is targeted to the computer, expand Personal.  Right-click on Certificates.  From the context menu, select All Tasks and then Import…

Step 24: On the Welcome page, click Next.

Step 25: Browse to the PFX file you previously created, and click Next.

Step 26: On the Password page, enter the password associated with the PFX file.

Step 27: On the Certificate Store page, click Next.

Step 28: On the final page of the wizard, click Finish.

Step 29: Then click OK.

Step 30: In the Certificate MMC on the NDES Server that is targeted to the computer, expand Personal.  Right-click on the old Exchange Enrollment certificate, and select Delete. 

Step 31: Then click Yes, to accept the deletion.

Step 32: Right click on the new Exchange Enrollment certificate.  From the context menu, select All Tasks then Manage Private Keys…

Step 33: Add the NDES service account and ensure that it just has Read permission.  Click OK.

Step 34: Right click on the new CEP Encryption certificate.  From the context menu, select All Tasks then Manage Private Keys…

Step 35: Add the NDES service account and ensure that it just has Read permission.  Click OK.
Step 36:  Reset IIS using iisreset command.

Step 37: Check the following url:
https://localhost/certsrv/mscep

Step 38: Check the following url:
https://localhost/certsrv/mscep_admin

When both pages are displaying the above then you know your NDES/SCEP is working correctly

08 February 2017

Upcoming Exchange 2013 CU16 requires .NET 4.6.2, .NET 4.6.1 no longer supported

The upcoming CU16 for Exchange 2013 requires .NET 4.6.2.
Expect the CU16 to check for the latest .Net version prior to installing as a prerequisite check.

Microsoft .NET Framework


The following table identifies the version of the Microsoft .NET Framework that can be used together with each version of Exchange. Supported versions are identified by an X character.
ImportantImportant:
Releases of .NET Framework that aren't listed in the table below are not supported on any version or release of Exchange. This includes minor and patch-level releases of .NET Framework.

.NET Framework
Exchange 2016 CU3 and later
Exchange 2016 CU2
Exchange 2013 CU15 and later
Exchange 2013 CU14
Exchange 2010 SP3
.NET Framework 3.5


X1
.NET Framework 3.5 SP1


X
.NET Framework 4.0


X1,2
.NET Framework 4.5


 X
X1,2
.NET Framework 4.5.1


 X
 X

.NET Framework 4.5.2
 X5
 X5
 X5
 X5

.NET Framework 4.6.1
X5
X3,4,5
X3,4,5
X3,4,5

.NET Framework 4.6.2
X

X
4


  1. If you are using Windows Server 2012, the .NET Framework 3.5 must be installed before you can use Exchange 2010 SP3.
  2. Exchange 2010 uses only the .NET .NET Framework 3.5 and .NET .NET Framework 3.5 SP1 libraries. It doesn't use the .NET .NET Framework 4.5 libraries if they're installed on the computer. We support the installation of any major or minor version of .NET .NET Framework 4.5 (for example, .NET .NET Framework 4.5.1, .NET .NET Framework 4.5.2, and so on) as long as .NET .NET Framework 3.5 or .NET .NET Framework 3.5 SP1 are also installed on the computer.
  3. If you're upgrading from a previously installed Exchange cumulative update, we strongly recommend that you install the latest cumulative update before .NET Framework 4.6.1 and its related post-release fixes.
  4. .NET Framework 4.6.1 requires post-release fixes if you want to install it on a server running a supported version of Exchange. The following are the .NET Framework 4.6.1 post-release fixes needed for Exchange.